

.jpg)


.png)

.png)
.png)
All you need to know about non-woven wallpaper
- WallDreamer
- Zoom sur
- 1297 views


All you need to know about non-woven wallpaper
First of all, what is non-woven wallpaper?
Non-woven wallpaper is a wall covering made from polyester fibres and cellulose laid in a sheet, covered with a layer of vinyl. Its thickness, strength and weight (weight of paper per m²) make it ideal for damaged or uneven walls.
The criteria to be taken into account when laying non-woven are :
Its thickness allows it to hide imperfections in the walls, although the walls must be prepared, and will offer greater resistance. It is therefore more resistant and also has the advantage of being easy to remove without any special product. You can choose non-woven paper with a printed or plain pattern. Like glass cloth, it lends itself well to being laid on a wall with slight imperfections, with a view to being painted.
Advantages of non-woven wallpapers
- Quick and easy to install
- Resistant: non-woven has more resistant properties than standard paper.
- Can be waterproof and washable.
How do I hang non-woven wallpaper?
Installing non-woven wallpaper is not the most complicated of tasks, but there are certain things you need to do to get the perfect result.
Prepare your wall properly in advance:
- Before applying your wallpaper, it's best to make sure that your wall is clean, neat and dry, and that the colour matches the dominant tones of your paper to avoid white lines between the strips.
- Wash your wall with a special wall cleaner, rinse and leave to dry. On glossy, satin paint, sand with sandpaper to improve the adhesion of the adhesive. If the wall has never been painted, apply an undercoat of plaster 24 hours in advance, called "primer paint". This will protect the wall and prevent the glue from being absorbed by the wall, so the paper can be removed more easily.
- For wall panels, plywood or drywall, fill all cracks and prepare the surface with an acrylic base coat:
Preparing the wallpaper strips
The preparation of the non-woven wallpaper strips will be different for seamless and seamless non-woven wallpaper.
In the classic way, for seamless wallpaper, you can link the strips together without having to worry about patterns, whereas for non-woven wallpaper with a seam, you have to take into account the different seams (straight seam, jumped seam, inversion of strips, etc.).
Some wallpapers offer a choice between two types of seam: they indicate either a "loose seam" or a "jump seam".
Check before installation!
The thing to check before installing non-woven wallpaper is that all the rolls you have used are from the same "bath".
The batch number is a two- or three-digit registration system that uses numbers or letters. It contains information that indicates whether a product comes from the same batch or whether a roll of wallpaper comes from the same printing run. For example: you have three rolls of wallpaper with the same article number, two are labelled "Bath number 15", one "Bath number 18".
This means that the roll labelled "18" comes from another batch produced at a later date and there may be minor differences in pattern, colour, lustre or texture.
Once you know the type of non-woven wallpaper you want, you'll need to make the appropriate cuts. Instructions for use are usually printed directly on each roll of wallpaper.
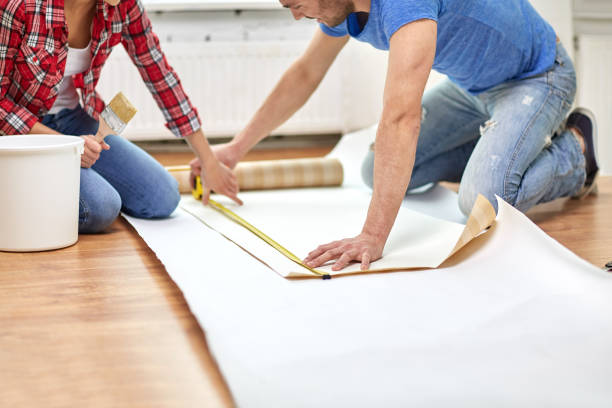
Get your measuring tape ready!
You'll need to measure the height of your wall from floor to ceiling, taking care to add a margin if you have skirting boards in place. Also measure the width of the roll to define the area to be glued to the wall.
Cut the number of strips you need for your wall or ceiling.
Let's get ready to install!
- Once you have measured the width of your strips, transfer this to your wall, subtracting 1 cm. Using a level, draw a line along the entire height of the wall as a reference point.
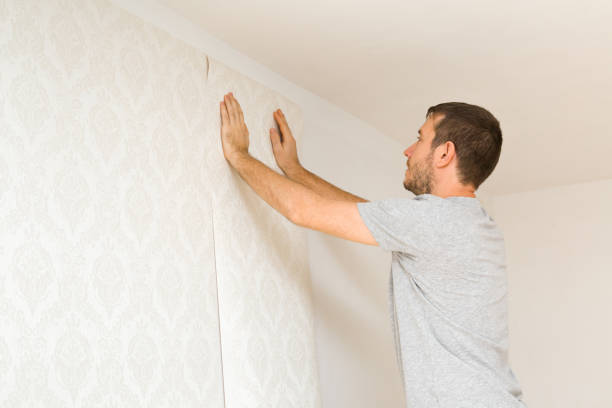
- Start by unrolling the 1st strip of wallpaper and aligning it with the angle of the ceiling and wall.
- Apply the wallpaper, working down the wall and avoiding creases, using a wallpapering knife. Deliberately overlap the mark so as to glue the area wider than the strip.
- Always trowel from top to bottom and towards the sides, trowelling continuously throughout the installation of the wallpaper.
- Using a second wallpapering knife and a cutter, trim off the excess non-woven wallpaper.
- Once the first strip of non-woven wallpaper has been hung, simply repeat the same steps for the next strips.
It is important to achieve a perfect seam between the different strips of wallpaper to avoid any demarcation. If the non-woven wallpaper is installed correctly, you won't see the different separations between the strips unless you get very close.
Now you have all the tools you need to renovate your home and save money at the same time, thanks to your ally, WallDreamer.